In this tutorial I explain how create a simple mobile banking application android studio platform. Nowadays most of peoples are migrate from mobile internet net banking to UPI payments. Because it’s very easy, within a 30 seconds we able to complete the payments. But in the mobile banking we need to manually enter the sender bank account number, name, IFSC code, branch etc. On the other hand also enters receiver bank name, account no, payments details and more .
However once upon a time everyone used mobile banking app and even nowadays 5 percentage of peoples are only using those features. The drawback is it take more times and we need to store the account number and other details. But in the UPI application everything was simplified and need to enter payments only.
This is the major reason for why most of peoples are starts to using UPI apps. For example Google Pay, Paytm, PhonePe applications are widely used by business peoples and students. Additionally they are providing more features like ticket booking, mobile recharge, transfer one account to another accounts, offers and more.
Now your questions, then why you are uploads this article ? I am right ? Good question, the reason is always we need to initial stage problem and solutions. Then only we able to complete the future problems in upcoming days if anything raised on our end.
That’s why here we are simply explain the concept of mobile internet banking web application using Java in android studio IDE. Suppose if you are looking for web application then go for PHP for better results. Both has same features, because we need only the development concepts.
Technologies
- Java
- XML
- Firebase
- SQLite
- Android Studio IDE
- Third Party Libraries
Permission Required
We need bank permission for manage the holder accounts. For that initially we need to get approval for each bank, otherwise use someone API who manage all access permission. But the recommended way is manually getting approval fro all banks. Then only do our works without depend someone else for every new updates.
However that’s not a easy steps. So some developers are simply manage the apps via getting REST API to send payments. Once you are get those approvals, then you got some idea like how it’s going & what are steps to be followed for further upcoming projects.
Every bank has separate API for complete the particular tasks. For example here I mentioned the ICICI bank API official documentation for more clarification. To do that first you have to create one developer account then manually place the code into our website where we build the application.
Mobile Banking Application Features
Let’s see the list of features when you are activating our application portal on your mobile phone. As usual we are developing same modules for where most of banks are followed the things. Because then only new & existing users are not facing any technical issues.
- Individual account for every users
- User Friendly Navigation
- Multiple Payment Options
- Official Documentation
- Easy to use
- Not so much difficult
- Test Payment Integration available
- User able to check the balance
- Account transfer
Mobile Banking Screenshot
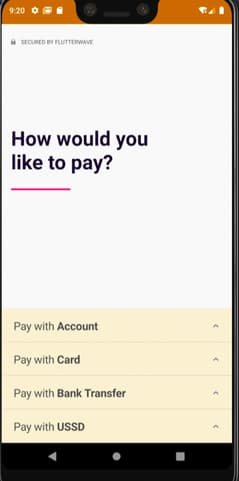
Once check the android studio application output file, after that you are getting clear idea like how it’s working on your system. Therefore in every project we added this feature instead of execute the project without download the code. If the screenshot is okay then you can move the next section to grab the full source code.


Source Code
Already we are developed UPI based android application like Google Pay, Phonepe, Paytm etc. So if you need those project once check the above tutorial link then try this mobile banking application. Here we are enable the OTP based application for two places. One is payment gateway integration and another one is when we are create new account on the particular application.